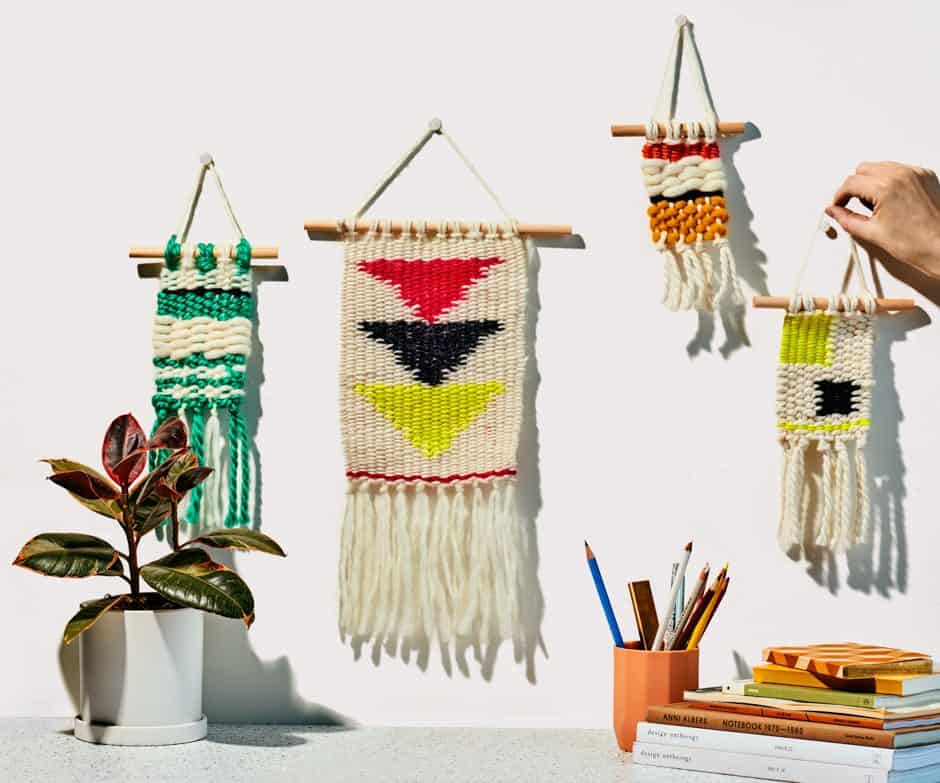
Linda’s Craft Corner: How to Make an Easy DIY Wall Hanging
This site contains affiliate links to products. We may receive commission for purchases made through these links. Price at time of publish date may change.
Crafting is a lovely way to unwind. Whether you prefer an afternoon activity like filling in coloring pages or can tackle larger projects like this bike planter, there’s no denying it’s pretty satisfying when you see your finished project. Drew’s wife Linda has always been a big crafter, and one idea she’s introduced us to is a DIY wall hanging.
This easy DIY is perfect for beginners, super customizable, and very affordable, so you can make as many as you like! Have a blank space on your wall that’s desperate for art? Whip up one of these and you have a special piece that you won’t see anywhere else. It could also serve as a fun activity for a night with friends or family.
All you need are a handful of common supplies, a little time, and Linda’s advice: “Play with different textures, colors, and patterns,” she says. “You’ll be weaving yourself into daydreams with this meditative craft!”
Supply List

Step 1
To make a loom, cut a rectangle out of cardboard. (This one is 8 by 12 inches.) Using a ruler, make 20 slits every 3/8-inch along the top and bottom. Snip the marks with scissors.

Step 2
Cut 10 equal-length pieces of yarn (these are 36 inches each), and tie them to the dowel. We used an easy lark’s head knot to attach the yarn. You can find demos of the knot online.

Step 3
To thread the yarn onto the loom, place the dowel behind the cardboard and slide the pieces of yarn through the notches, coming over the top and going under the bottom.

Step 4
Thread your needle and go over and under the yarn. To make it easier to weave, slide a scrap of cardboard between the loom and the yarn. Change colors to create patterns, leaving a few inches of yarn at the edges so the weaving doesn’t unravel.

Step 5
Once you’re finished with your pattern, fill in the rest with your background color. When you’re done weaving, carefully slide the bottom threads off the loom in pairs and knot them to secure the bottom of the weaving.

Step 6
Flip the weaving over and thread the yarn that’s hanging out from the sides under a few stitches to keep the weaving secure. Tie a piece of yarn to the dowel, then find a spot to showcase your masterpiece!
Don’t forget to share your DIY wall hanging on Instagram and tag @DrewandJonathan so we can check it out!
Craft by Jodi Levine | Photographs by Chelsea Kyle | Prop Styling by Astrid Chastka