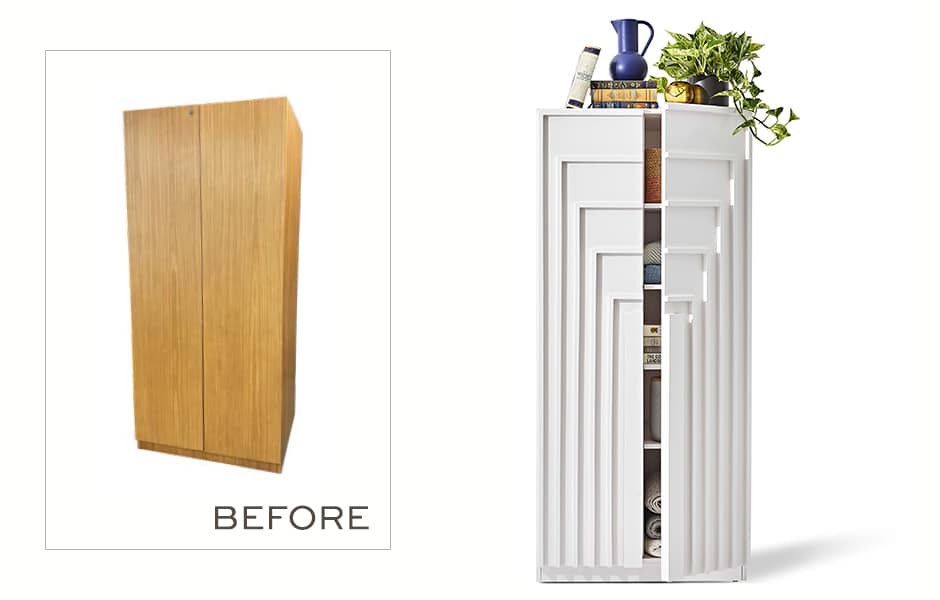
Hit Refresh: Armoire Upgrade
With a quick trip to the hardware store and a couple of clever tricks, you can transform a plain cabinet into a chic spot to stash your stuff.

The cabinet we made over was an old piece of oak veneer-wrapped Steelcase office furniture, with not much personality or character, but a good blank slate just begging for an upgrade.
(FYI: these instructions are for the dimensions of the cabinet we found, but they’re adaptable so that you can retrofit them to work with your furniture size!)
What you need
Found armoire
Tape measure
Pencil
Sandpaper
Primer
Semigloss paint
Paintbrush
Screwdriver (to remove hardware)
3/4” square dowels
36” long 1/2” x 3” craft board
36” long 1/2” x 2” craft board
Miter box, or chop saw
Wood glue
Pin nailer (or you could just glue and clamp the dowels on if the piece has been sanded down to the raw wood)
Instructions:
1. To start, remove the doors and lay them on a flat surface and remove any existing hardware from the doors.
2. We created the cool geometric handles using 36” long 1/2 x3” craft board glued and pin nailed onto a 36” long 1/2” x 2” craft board. Adjust your dimensions accordingly, but the two pieces should be the same length, with the top piece being about an inch wider than the bottom piece. This creates a staggered lip to open the door.
3. Make two handles, then attach one to each of the doors with wood glue. Clamp them in place while they dry.
4. To create the rest of the geometric detailing, start by wood-gluing a ¾-inch-square dowel to the outside edge of each door.
5. Measure the remaining width of the doors and divide the space into five equal sections, marking as you go.
6. Repeat the same process horizontally. See where the marks intersect? That’s how long your dowel pieces should be. Cut them and attach with wood glue.
7. Lightly sand the doors and the cabinet.
8. Prime and paint the cabinet and doors (we used Sherwin-Williams Modest White).
9. Allow everything to dry and reassemble using existing hardware.


